How to Enable Web Push Notification on your Blog

Starting a blog is easy, but attracting traffic to your blog and focusing on increasing it every month is a real challenge. Because without traffic your hope of monetizing it will fade away. Bloggers put in a lot of effort in creating content and update their sites regularly. But it’s not always rainbows and butterflies, bloggers have to face a lot of pitfalls in their journey.


Blogging is all about writing interesting and quality content on your site so that people visit and start sharing your write-up with others, this way your blog will gain more backlinks and it will climb up the ladder on the search engine ranking index.

Today I will be sharing a tip on how to generate more traffic on your blog and make your visitors come back whenever you post new content. Most people who are new to blogging are not aware of this feature, this new technology is called Web Push Notification.


What is Web Push Notification?


These are notifications that are sent to a user’s device through the web, it works as a background process in the browser. These notifications slide in from the bottom or top of your desktop screen or they appear in the notification section on mobile devices. All that is required for this feature to work is a piece of javascript code that has to be integrated into your website. Your blog visitors can subscribe for web push notification alerts with just one click and they will start seeing alerts on their devices, so as soon as new content has been uploaded to your blog they will be notified about it gone are the days when people used to fill in the email subscription form to get updates in their inbox.


How to enable Web Push Notifications?


Now, there are many web push notification service providers but I recommend going for Webpushr. Their free plan offers 10000 subscriptions which is the highest number of subscriptions offered by any free plan. In this example, I will be showing you how to integrate the code with a site on blogger.com. The method is similar for other platforms too. 


Here are the steps that you need to perform :


Step 1


Visit Webpushr and sign up for a free account. After you have logged in click on Add a New Site.


webpushr


Select the platform that you want, in this example, I have selected blogger. Enter the details of your website and click Next. You will see the javascript code on the next page which you have to copy and paste in your HTML source file or you can skip this and configure it later once your account is set up.


Step 2


Once your account has been created the first thing you need to do is copy the JS code and paste it into your HTML file to complete the integration process.


On your web push notification console go to Integrations -> Manual Integration and copy the javascript code.


webpushr integration


Step 3


Log into your blogger.com console and select Edit HTML. You will find this in Themes ->  Customize. Find the <head> tag on your HTLM page you can use Ctrl + F to find it and then paste the javascript code right below the <head> tag and click on save. 


html


Step 4


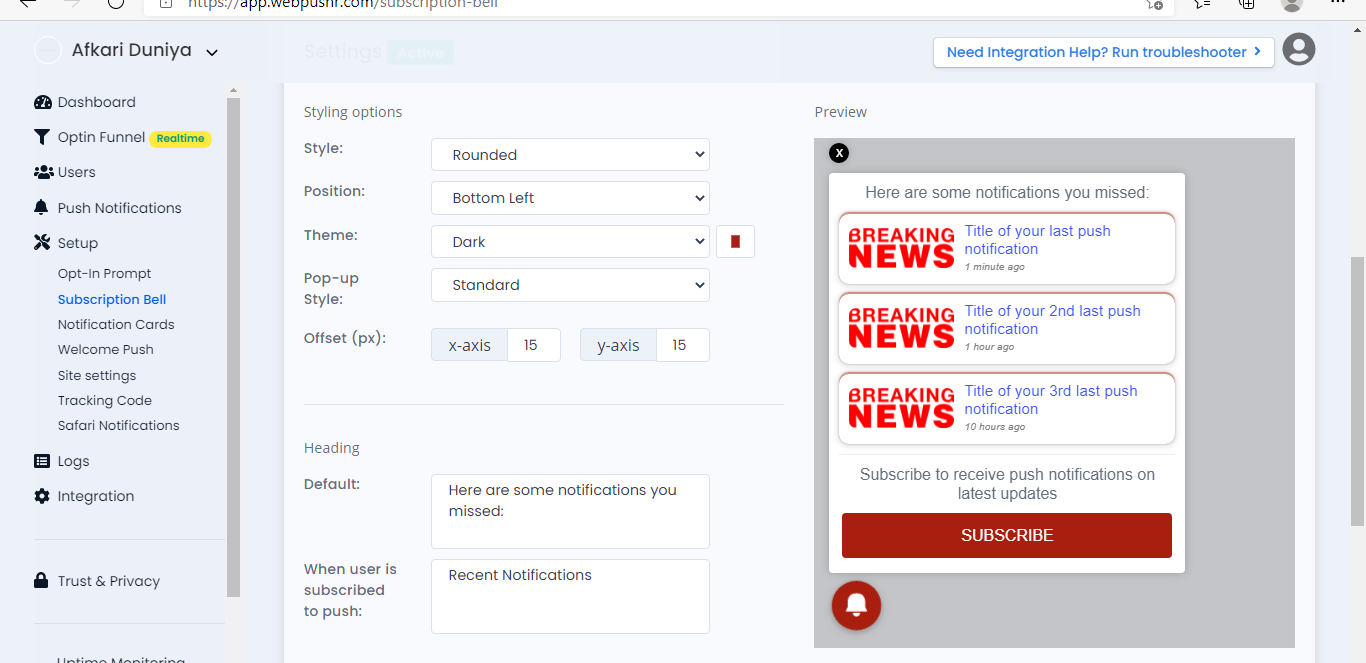
Once you add the JS code on the HTML page it will automatically connect to the service provider’s web push notification service. You can then proceed with customizing the notification opt-in prompt.


Under Setup -> Opt-in Prompt you can change the background and text color of the prompt, you can add an icon if you want, and change the re-prompt delay.


A subscription bell can also be added to your site the interface is very user-friendly, hence I won’t be explaining how to set up everything in this post you will be able to figure it out.


Step 5

There is one drawback with the Integration on blogger. You won't be able to send automatic push notifications when you update your blog this feature is only available on the WordPress plugin. Push notifications on blogger have to be sent manually.

Here is how you can push update alerts manually by creating a campaign on the webpushr console:

Go to Push notifications -> Manual Push -> Create New Campaign


Enter a name for your campaign :


After clicking Create Campaign select the All Users Check box to send the notification to all your subscribers:


Write the Title name and a short description about your update, enter the URL for your blog post. It will show you a preview of the web push notification below.


You can leave the settings on default and proceed to the final step which is delivery.


On the delivery page you are given two options you can send the notification instantly to all your subscribers or you can schedule it at a specific time. After you select your preferred option click on send campaign and all your subscribers will receive a notification on their device as shown below.


So that's it, once you have everything set up your visitors will see an opt-in prompt when they visit your site as shown in the image below. You can check the number of subscriptions on the web push notification console. Webpushr also has a dashboard and an impressive analytics feature which you can use to check the notification delivery and if they have been clicked or closed by the user. Everything in the GUI is pretty straightforward and easy to understand.

web push notification


If you found this post helpful please share it with others and I would love to see your comments in the comment section below.
Jason Pinto

I write about everything I find interesting and believe in living a life worth writing about. So if you love reading about food , wellness, lifestyle and a little bit of tech and all things random, you’re in the right place!

2 Comments

  1. Hmm that's very useful ... 👍👍👍
    Thanks for sharing with all . 🙏🏻

    ReplyDelete
  2. The details are well explained. Key it up.

    ReplyDelete
Previous Post Next Post